Creation of aliases, external sender addresses and change of display name
Display of the display name at the recipient
By default, your e-mail address or created alias address with your first name and surname is displayed as the display name for the recipient. However, you have the option of displaying any display name or only the relevant e-mail address.
Proceed as follows:
-
Log in to the login page using your credentials.
-
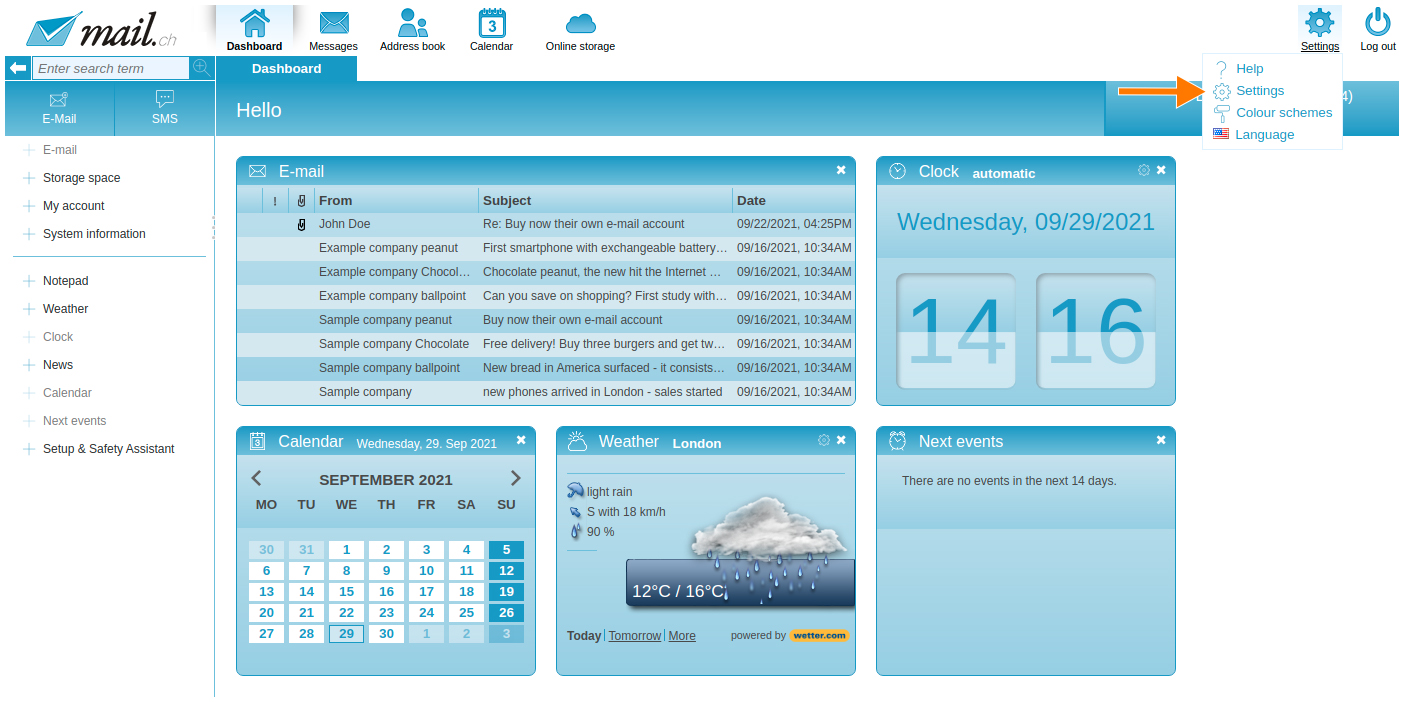
After logging in, you are on the start page of the webmailer; from there, go to the settings mode. To do this, click on "Settings" (cogwheel) at the top right and then on "Settings" again in the menu.
-
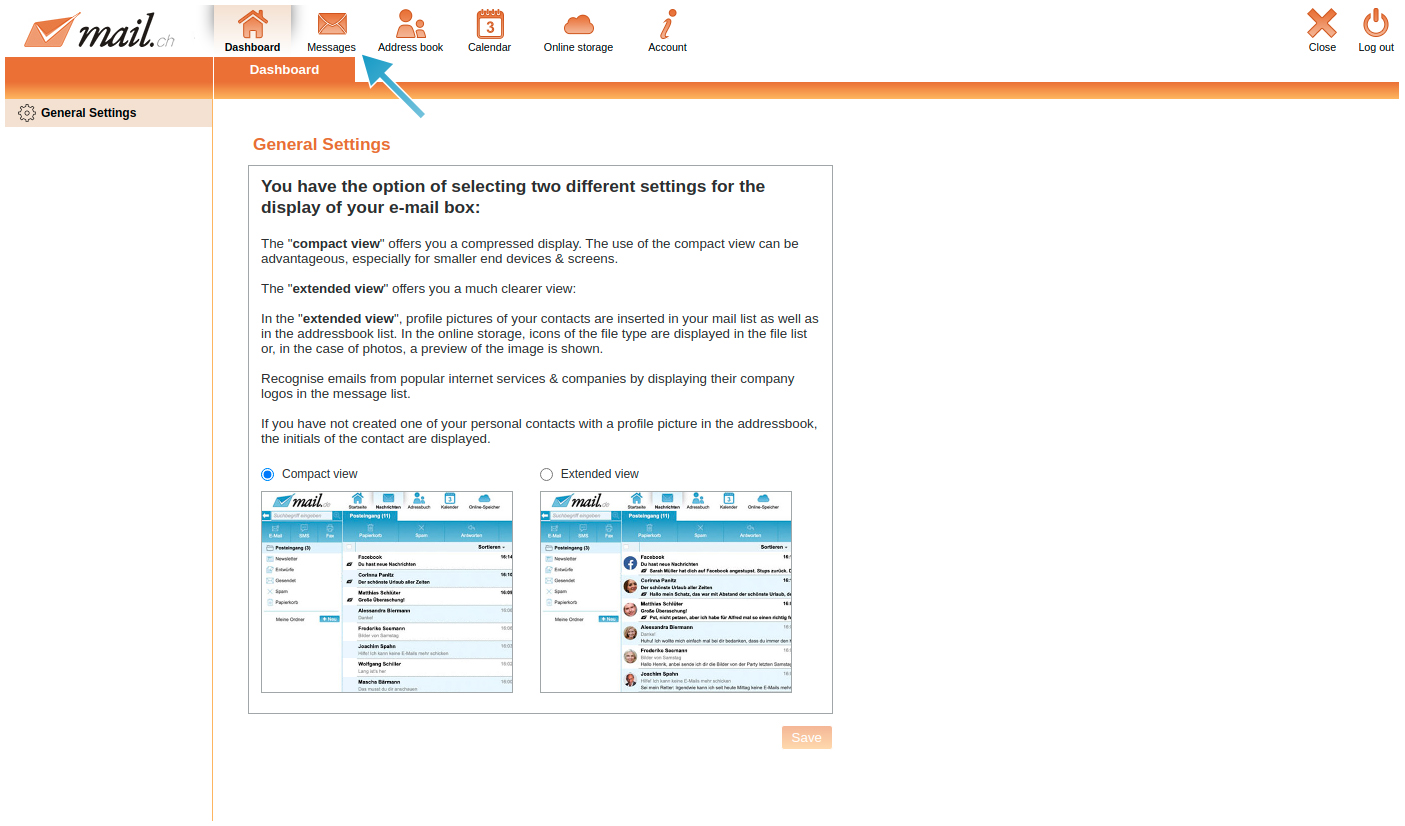
The navigation bar turns orange, go to the "Messages" tab.
-
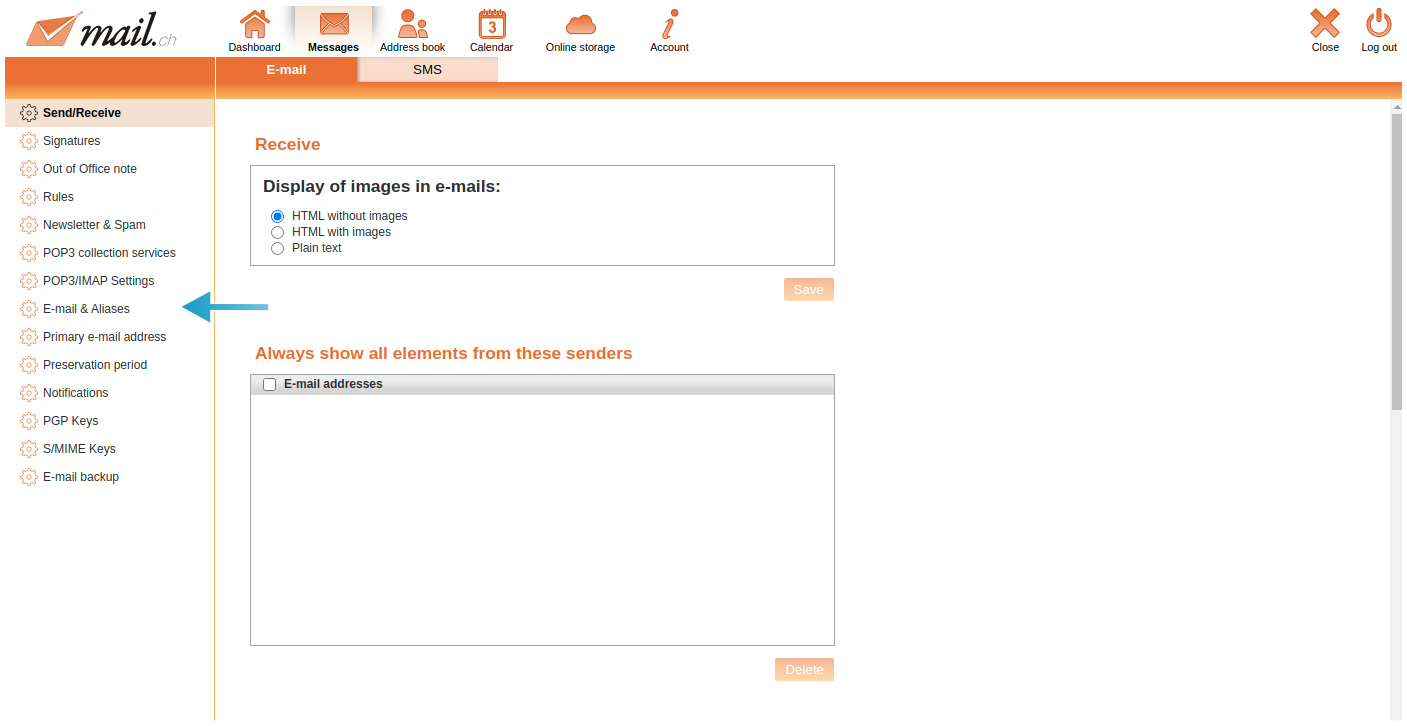
There are various menu items on the left-hand side, go to "Email & Aliases".
-
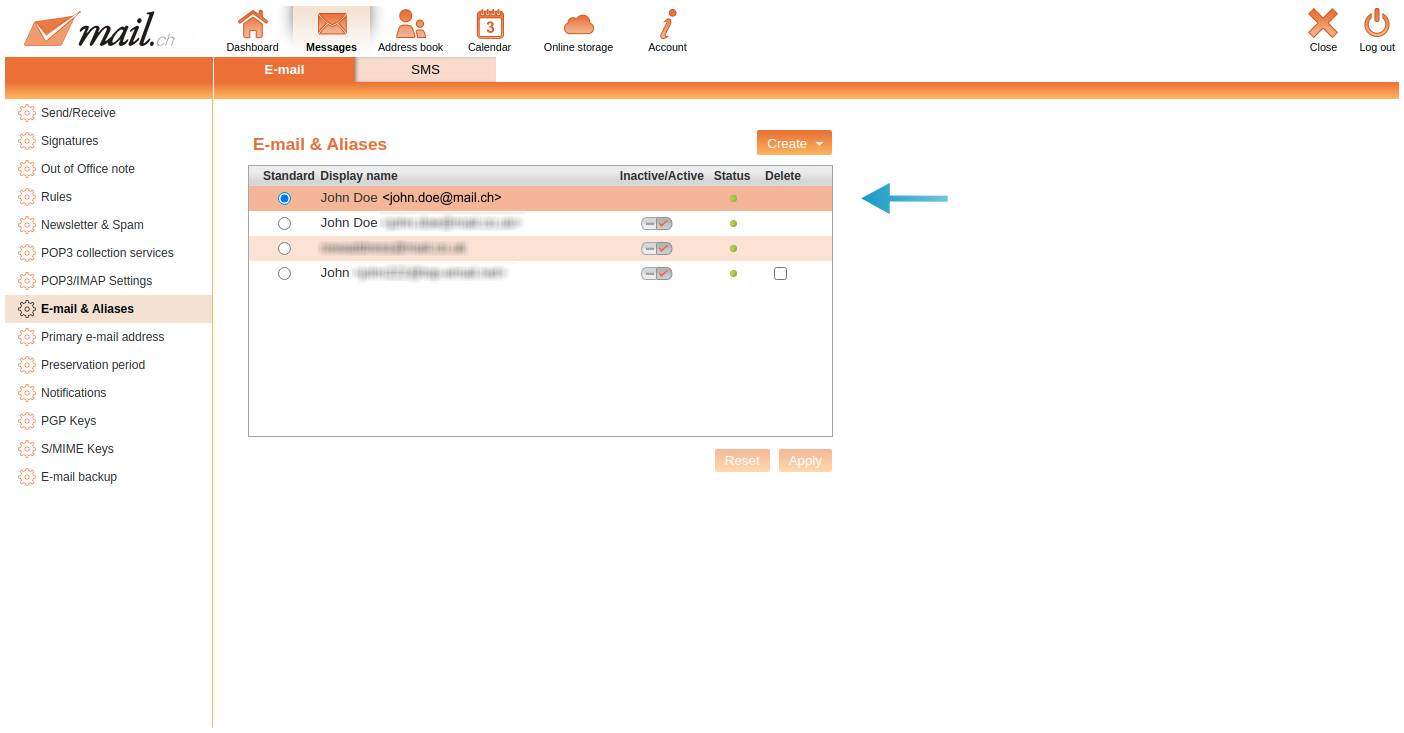
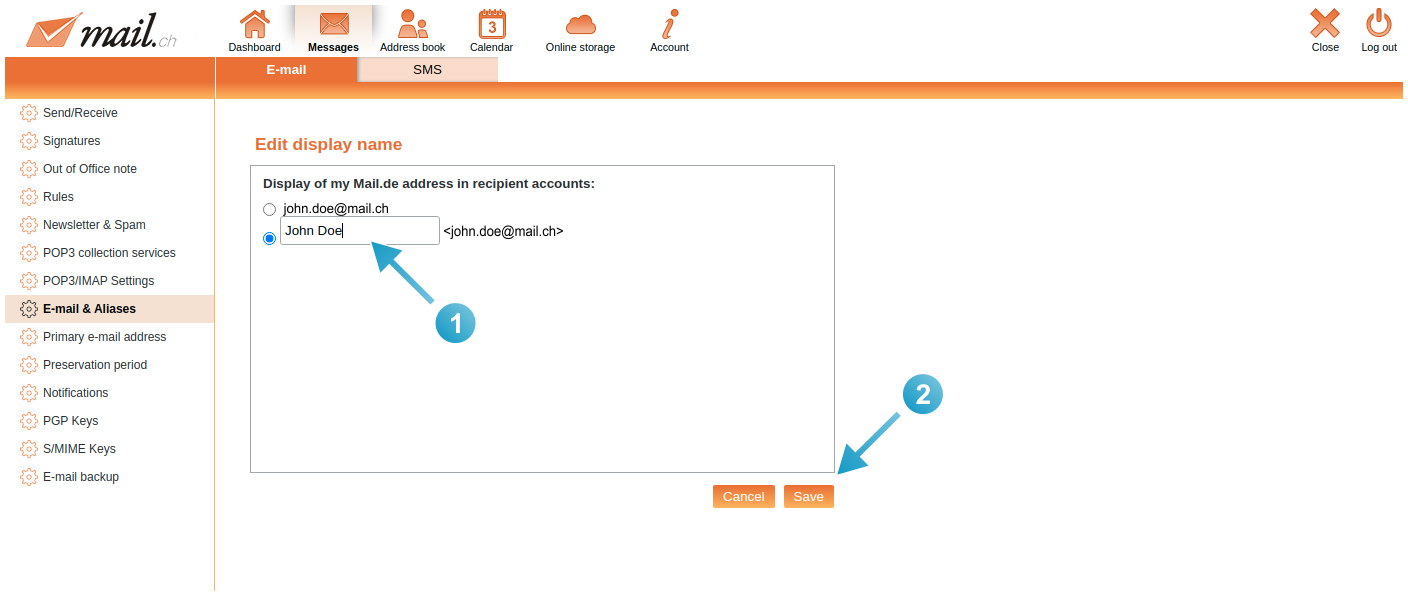
Further down in the middle area of the screen is the listing of the mail.ch address and the aliases created. Select the address where you want to change the display name.
-
The upper screen area changes and "Edit display form" appears. Now you can make the desired changes to the display name and then click on "Save". To return to the webmailer, click on "Close" (cross) at the top right.
Set up & use alias addresses
An alias address is another e-mail address that you can set up if you want to be reachable under different e-mail addresses and still use only one mail.local mailbox. You receive all e-mails sent to your alias address(es) in your mail.local mailbox, which makes administration very easy. When replying to an e-mail sent to an alias address, the alias address is automatically used as the sender. When composing an e-mail, you can use your alias address as the sender. Depending on the mail.local product you are using, you can create up to 25 additional e-mail aliases.
If you want to create an alias address, proceed as follows:
-
Log in to the login page using your credentials.
-
After logging in, you are on the start page of the webmailer; from there, go to the settings mode. Click on "Settings" (cogwheel) at the top right and then on "Settings" again in the menu.
-
The navigation bar turns orange, go to the tab "Messages".
-
On the left side there are various menu items, go to "E-mail & Aliases".
-
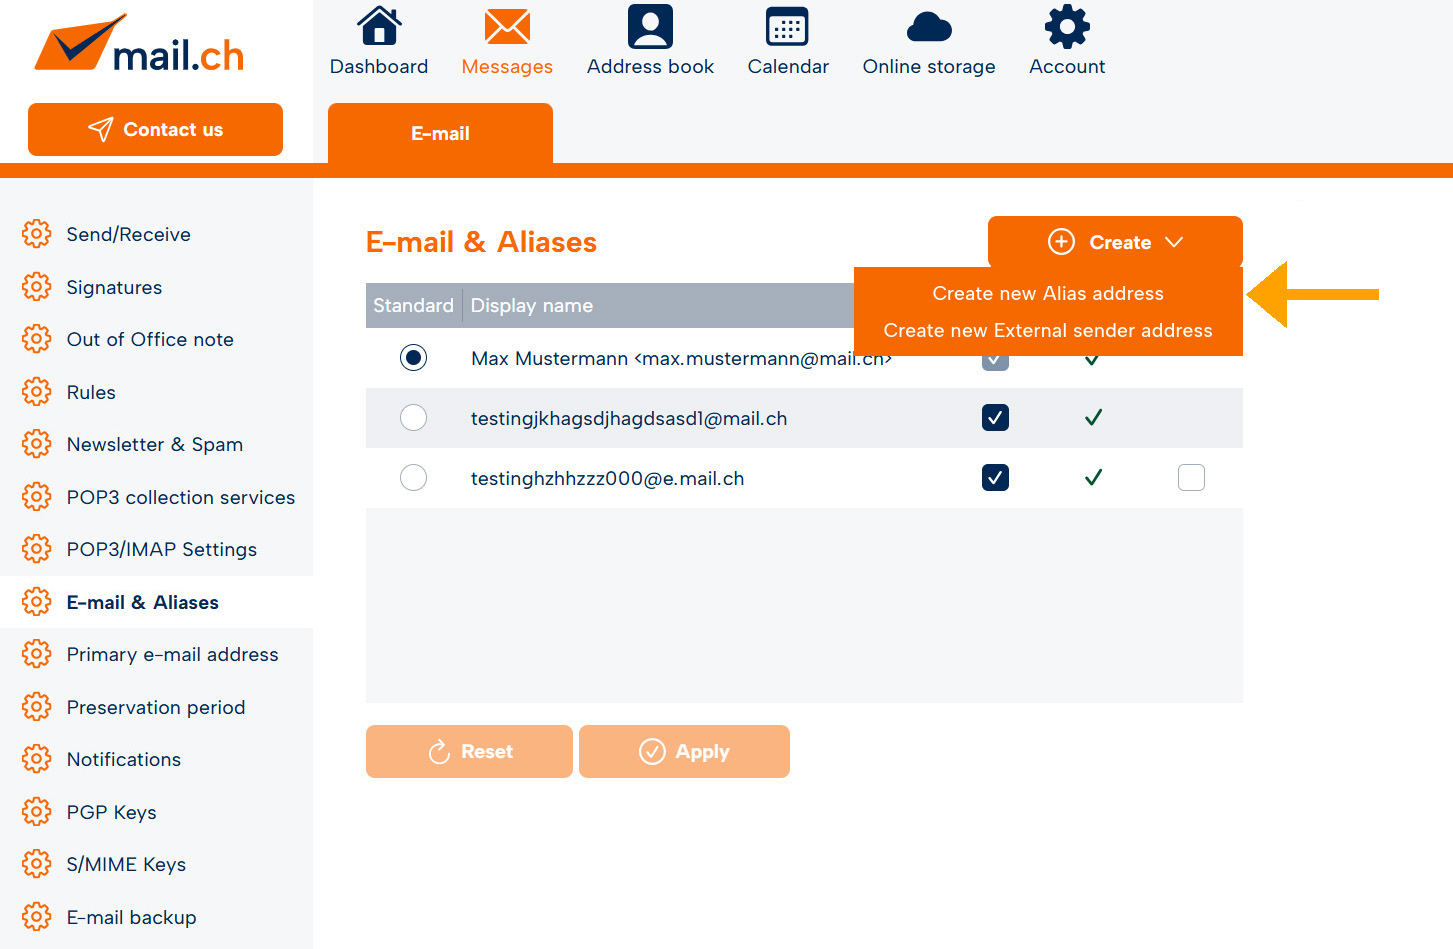
Select "Create new Alias address" from the drop-down menu.
-
In the upper part of the screen you will see an input field (1) followed by an @ sign and an extension which you can choose. Enter the desired name of the alias address in the input field. If you then click on "Check now" (2), the system checks whether the desired alias address is still available.

-
If the alias address is available, you will receive the message " Your desired alias address is available" (1). You can then select the desired display format (display name) (2). Finally, click on "Create" (3) and the alias address is created.

-
To return to the webmailer, click on "Close" (cross) at the top right.
Important note: When deleting alias addresses, please keep in mind that these are permanently blocked for security reasons. On the other hand, your counter of used alias addresses will not be reseted on the number of deleted aliases!
It is not possible to delete mail.ch alias addresses.
Alias addresses can be deactivated at any time.
We currently provide the following alias addresses:
"e.mail.ch"
"fun-mail.net"
"my.mail.ch"
"servus-mail.de"
"top-email.net"
Deactivate alias addresses
You have the option to deactivate alias addresses. A deactivated alias address cannot receive messages, messages cannot be sent via it and defined rules that are applied to the deactivated alias address no longer apply. It is virtually invisible. A deactivated alias address can be reactivated at any time.
Proceed as follows:
-
Log in to the login page using your credentials.
-
After logging in, you are on the start page of the webmailer; from there, go to the settings mode. Click on "Settings" (cogwheel) at the top right and then on "Settings" again in the menu.
-
The navigation bar turns orange, go to the tab "Messages".
-
On the left side there are various menu items, go to "E-mail & Aliases".
-
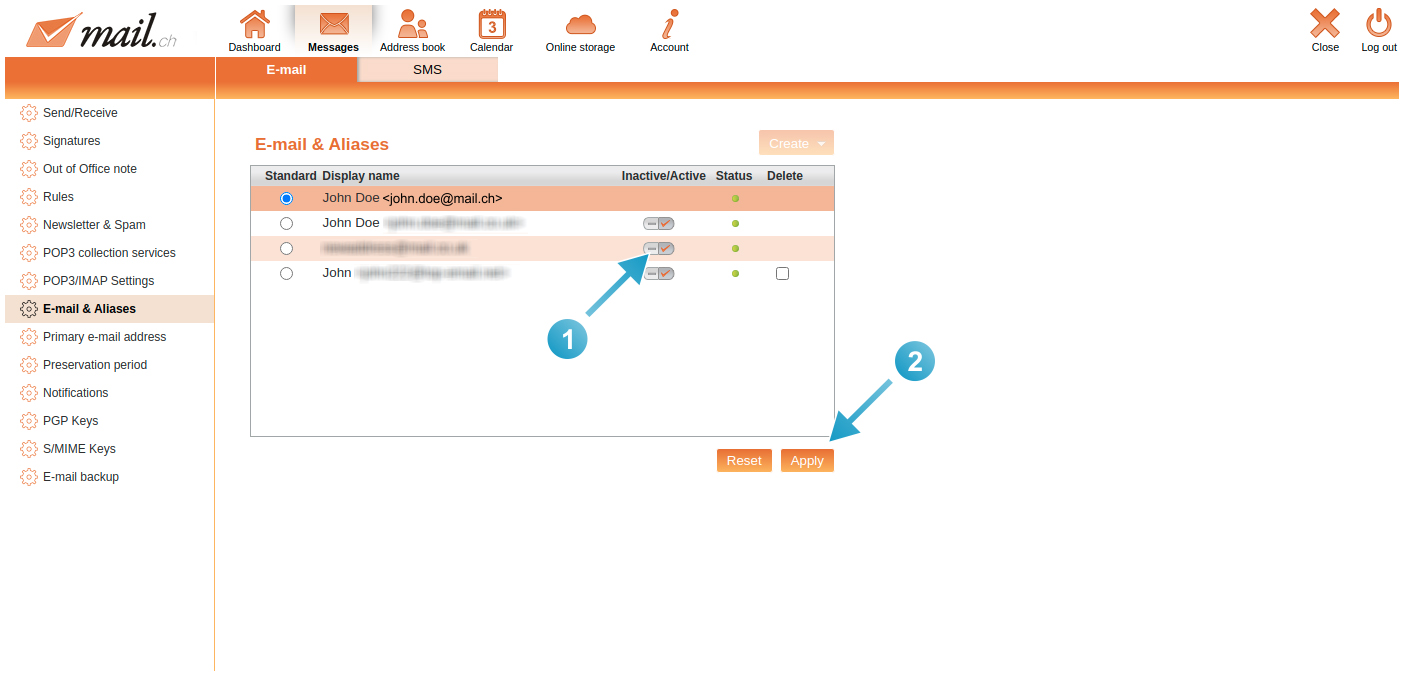
In the middle area of the screen, further down, there is a list of the aliases addresses that have been created. Uncheck the box in the "Active" table column (1) for the desired address you wish to deactivate and then click on "Apply" (2). To return to the webmailer, click on "Close" (cross) at the top right.
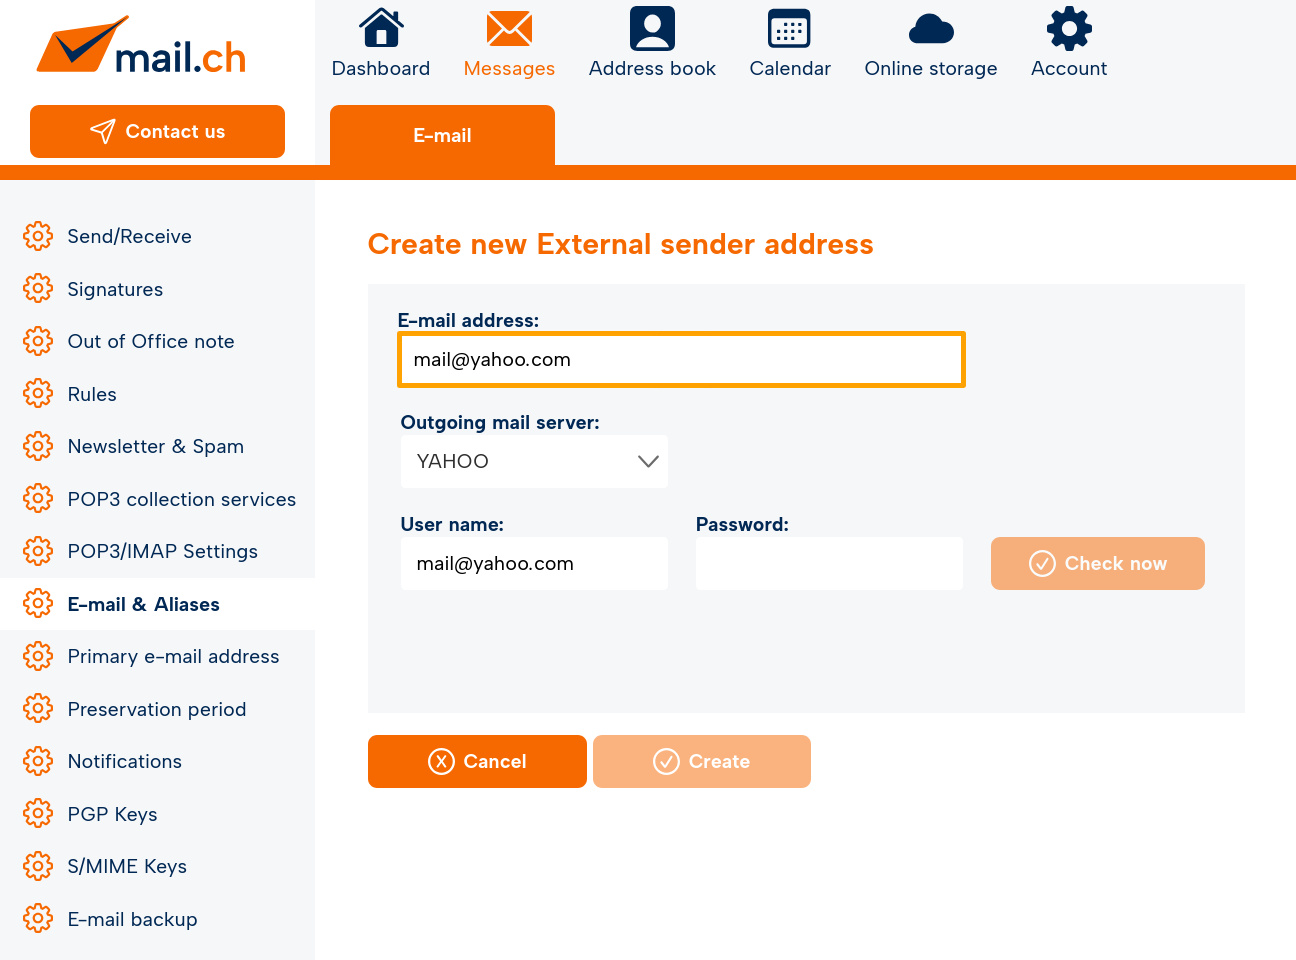
Creating external sender addresses
You have the option of sending e-mails from mail.chWebmailer using your e-mail addresses from other providers. For example, you can conveniently send messages via your Gmail or Yahoo! address, as well as via your own domain. All you have to do is set up these external sender addresses.
Proceed as follows:
-
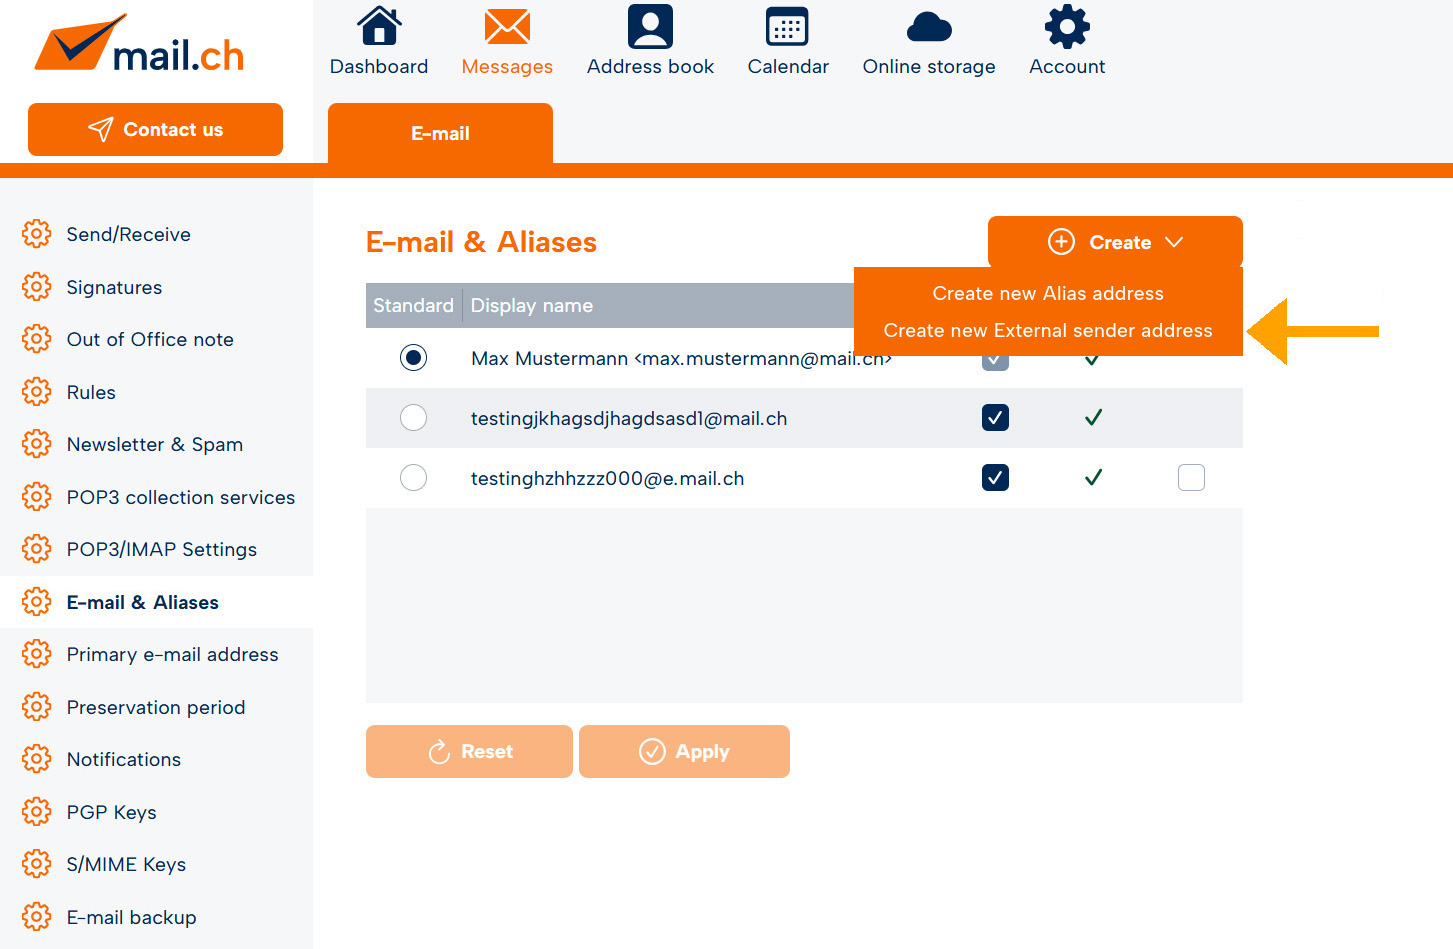
Select "Create new External sender address" from the drop-down menu.
-
Enter your external e-mail address (e.g. mail@yahoo.com).
-
If the e-mail address can be assigned to a provider, this provider will be displayed under "Outgoing server". Otherwise, "Other provider" is displayed, and you must enter the SMTP server data yourself.
-
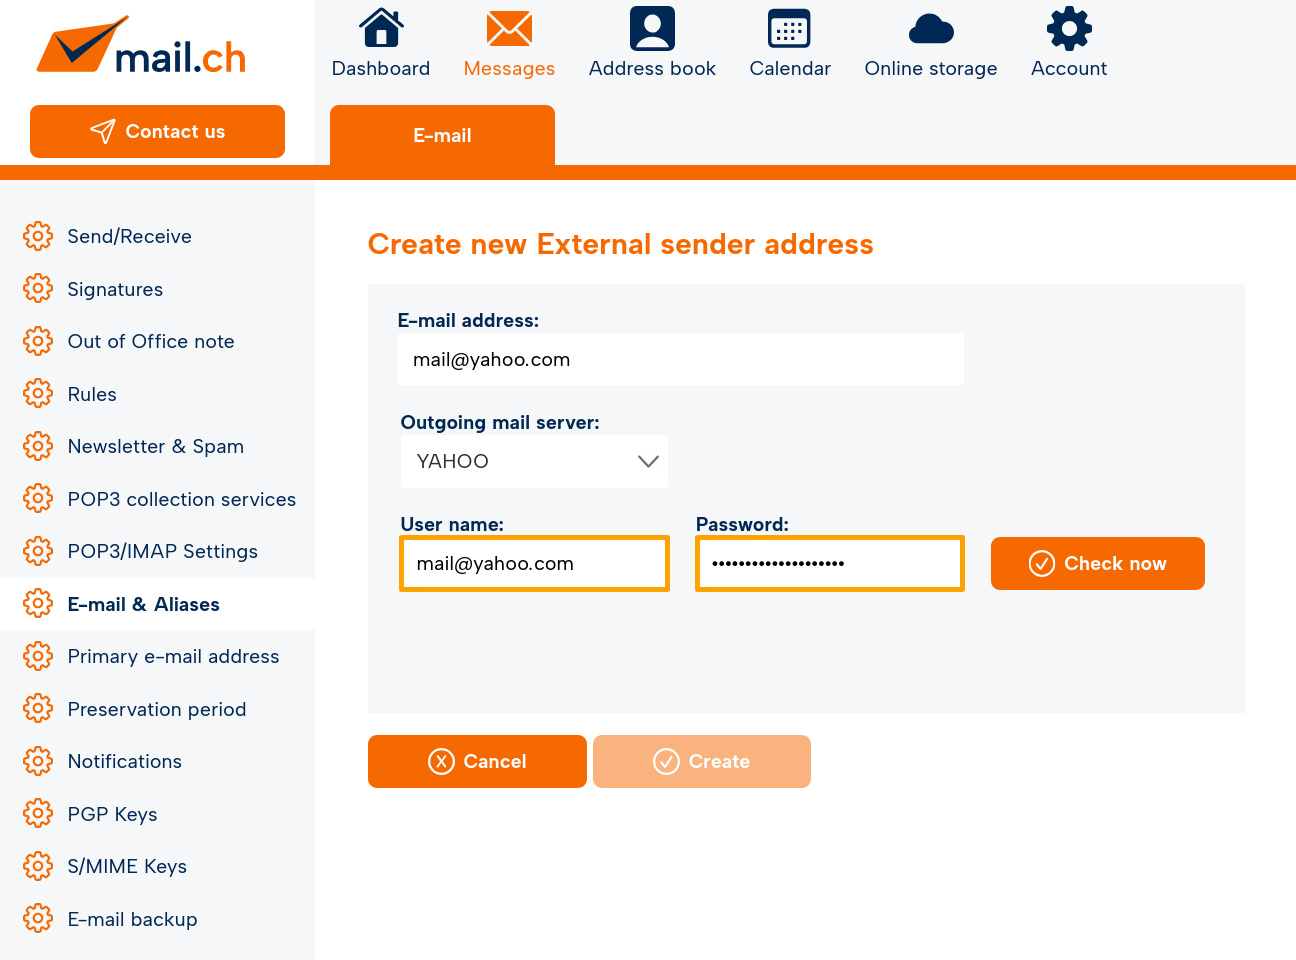
Now enter the username and password for the relevant access and click on "Check now".
-
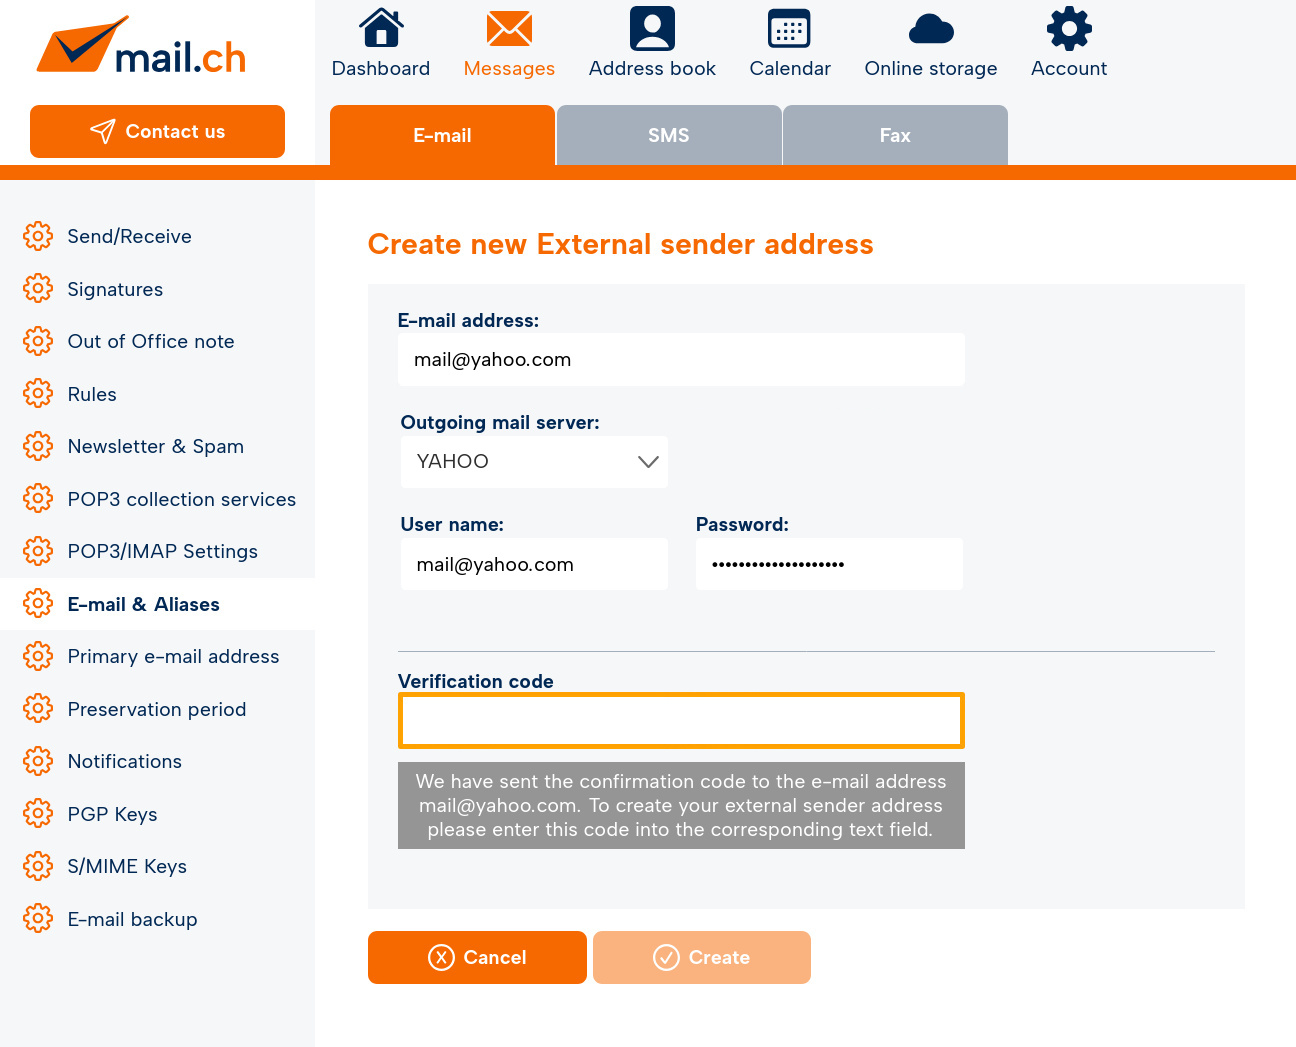
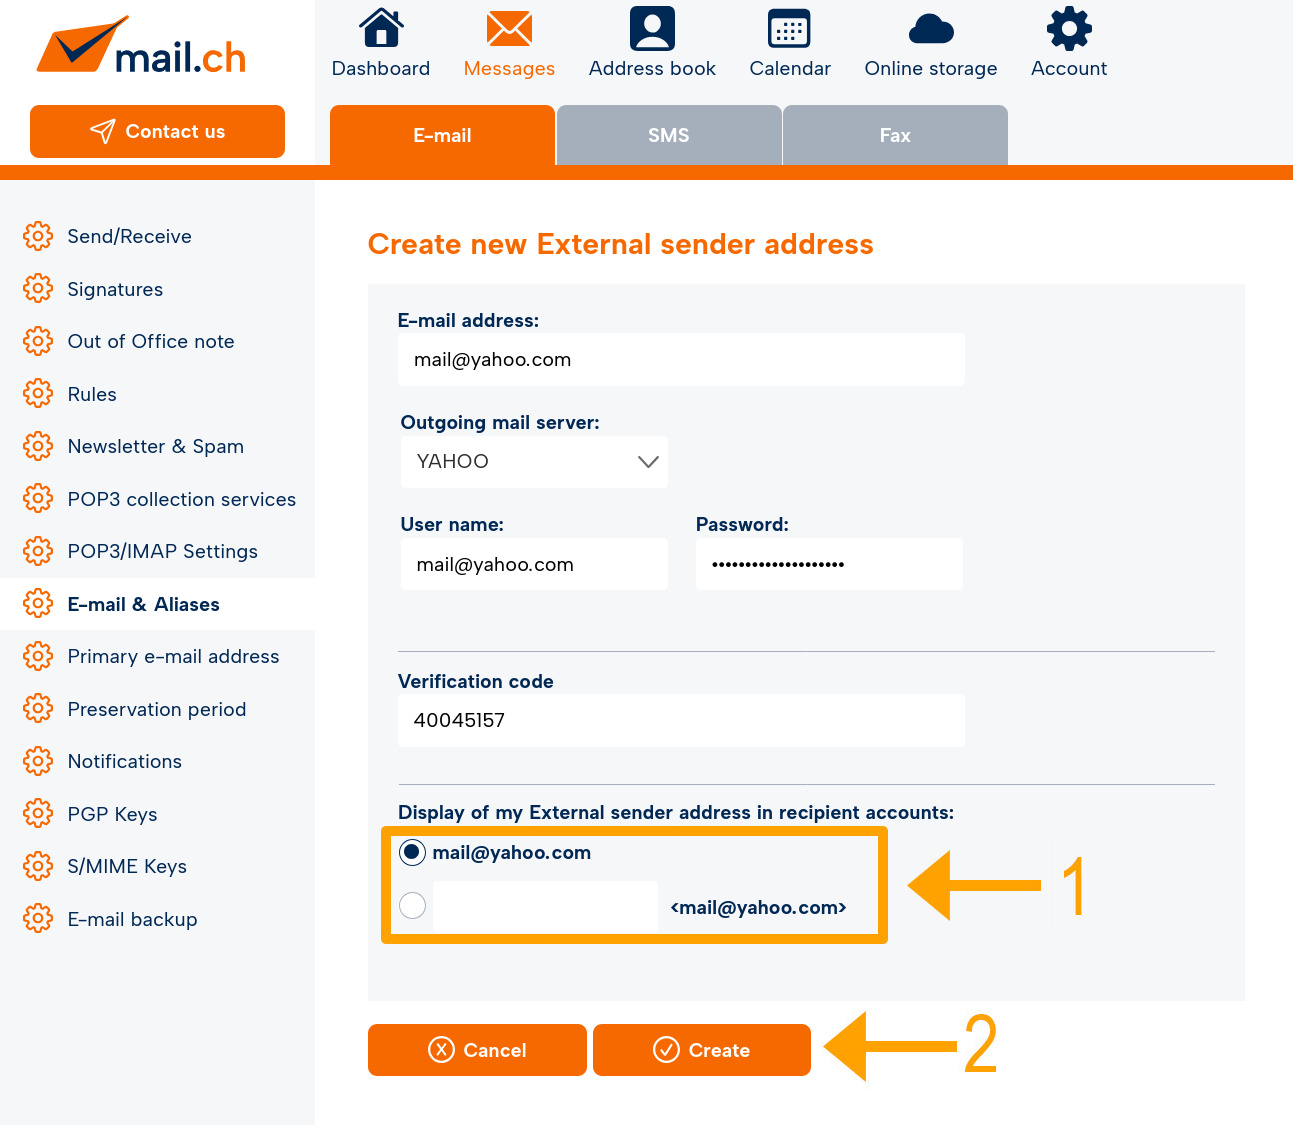
If the connection to your provider can be established, a confirmation code will be sent to the relevant e-mail, which you enter in the input form provided.
-
Select the desired display name for the recipient.
-
Click on "Create" to check the confirmation code and set up the external sender address.
-
The external sender address is now displayed as "Active" in the "E-mail & Aliases" list.
It can now be used, but also edited and deleted.